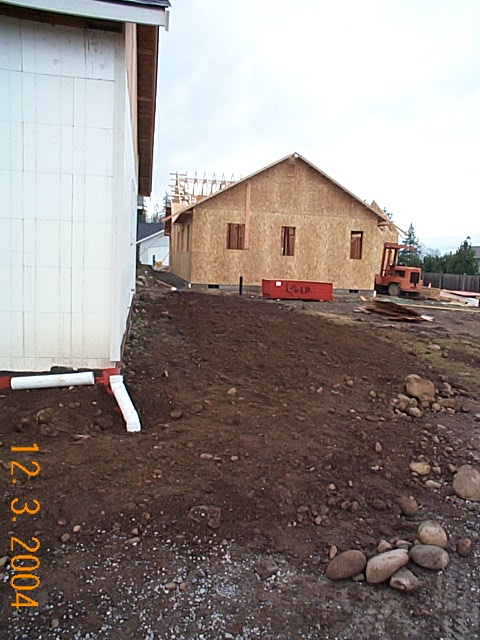
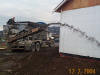
 December 2, 2004 - Thursday - The roof is finally done!! Earlier this week
Mark and Jeffrey completed the roof so now is the time to work on extending our
utilities out to the street and get them connected. We worked into the
dark last night using a small track hoe to extend the trench out to the street.
Maybe Mark was sorry he reminded Jeffrey the track hoe had a light that makes
digging in the dark real easy!
December 2, 2004 - Thursday - The roof is finally done!! Earlier this week
Mark and Jeffrey completed the roof so now is the time to work on extending our
utilities out to the street and get them connected. We worked into the
dark last night using a small track hoe to extend the trench out to the street.
Maybe Mark was sorry he reminded Jeffrey the track hoe had a light that makes
digging in the dark real easy!
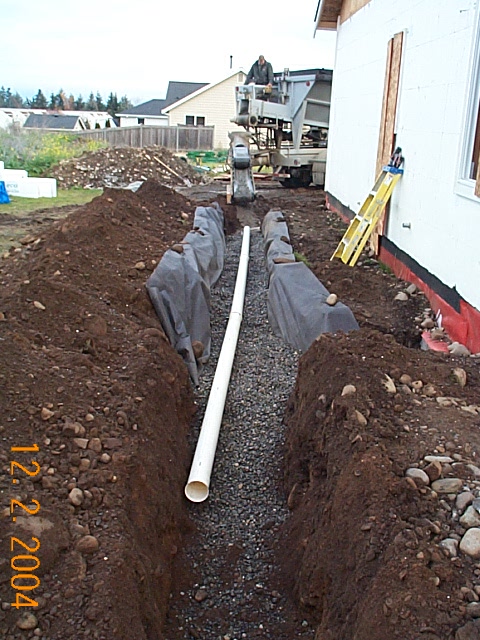
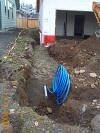
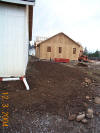
This picture shows the conduit for the phone/TV cable as well as the water
service pipe after they have been extended out to the street. As with the
sewer pipe, we place the water pipe in a bed of sand for protection from large
rocks. If you look carefully you can also see the black pipe in the lower
right hand portion the of this picture. This is the feed from the city
water system which we'll connect to our water meter, then to our back flow
valve, and finally to our water service pipe.
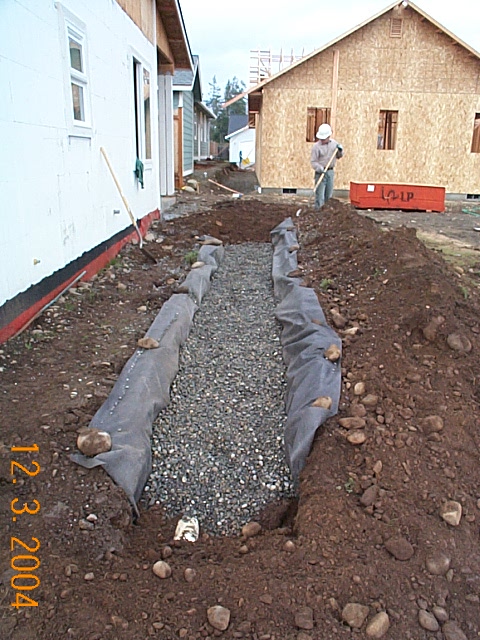
 December 2, 2004 - Thursday - As part of our night time track hoe work last
night, we also extended the trenches for our down spout drains and dug our "dry
well". The dry well is the place all our down spout water goes so it can
be
absorbed back into the ground in a controlled manner. The dry well is a
trench that is filled with gravel. Our down spout pipe is extended into
this gravel but this time with perforated pipe. When the water from the
down spouts reaches the dry well, it escapes through the holes in the perforated
pipe, goes through the gravel, and is absorbed into the ground.
December 2, 2004 - Thursday - As part of our night time track hoe work last
night, we also extended the trenches for our down spout drains and dug our "dry
well". The dry well is the place all our down spout water goes so it can
be
absorbed back into the ground in a controlled manner. The dry well is a
trench that is filled with gravel. Our down spout pipe is extended into
this gravel but this time with perforated pipe. When the water from the
down spouts reaches the dry well, it escapes through the holes in the perforated
pipe, goes through the gravel, and is absorbed into the ground.
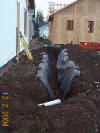
This picture shows staff member Mark Everson working on the piping as it
comes around the front of the home to the dry well which is on the north side of
the home.
 December 2, 2004 - Thursday - A good shot of the dry well trench early in its
creation. The sides and top of the dry well must be lined with "filter
fabric" in order to keep soil out of the gravel. Here you can see the
filter fabric in place, waiting for the placement of the gravel. Since the
perforated pipe should be placed in the upper third of the gravel it is not
installed yet.
December 2, 2004 - Thursday - A good shot of the dry well trench early in its
creation. The sides and top of the dry well must be lined with "filter
fabric" in order to keep soil out of the gravel. Here you can see the
filter fabric in place, waiting for the placement of the gravel. Since the
perforated pipe should be placed in the upper third of the gravel it is not
installed yet.
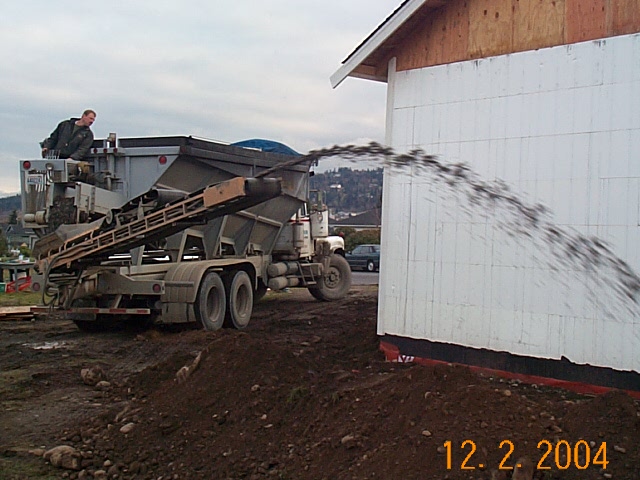
 December 2, 2004 - Thursday - Since Mark and Jeffery have done so much moving of
earth and gravel by hand during this project, this time Jeffrey decided to bring
in the "AgraCat". Sequim Redi-Mix (360-683-5680) owns this wonderful machine and it
makes quick work of placing aggregate! Jason was our operator for this job
and the conveyor belt coming off the back end of the AgraCat allows him to
place material very precisely! This shot shows Jason starting to fill up
the dry well trench with 7/8" washed rock. Even though the AgraCat with
Jason at the helm is very accurate, we took the precaution of covering the nearby windows with sheets of OSB. Better safe than sorry!
December 2, 2004 - Thursday - Since Mark and Jeffery have done so much moving of
earth and gravel by hand during this project, this time Jeffrey decided to bring
in the "AgraCat". Sequim Redi-Mix (360-683-5680) owns this wonderful machine and it
makes quick work of placing aggregate! Jason was our operator for this job
and the conveyor belt coming off the back end of the AgraCat allows him to
place material very precisely! This shot shows Jason starting to fill up
the dry well trench with 7/8" washed rock. Even though the AgraCat with
Jason at the helm is very accurate, we took the precaution of covering the nearby windows with sheets of OSB. Better safe than sorry!
 December 2, 2004 - Thursday - A great shot of Jason using the AgraCat to place
gravel at the far end of the dry well. Can you say "precision placement"?
December 2, 2004 - Thursday - A great shot of Jason using the AgraCat to place
gravel at the far end of the dry well. Can you say "precision placement"?
 December 2, 2004 - Thursday - The dry well is 2/3 full of gravel so now is
the time to place the perforated pipe. Our dry well is very conveniently
placed on the north side of the home. This allows us to connect the rear
down spout drains to one of this perforated pipe, and to connect the front down
spout drain to the other end. Nice!
December 2, 2004 - Thursday - The dry well is 2/3 full of gravel so now is
the time to place the perforated pipe. Our dry well is very conveniently
placed on the north side of the home. This allows us to connect the rear
down spout drains to one of this perforated pipe, and to connect the front down
spout drain to the other end. Nice!
 December 2, 2004 - Thursday - This picture shows the dry well with the
perforated pipe installed and the final layer of gravel on top. Now we
can fold over the remaining filter fabric to cover the top of the gravel, and
then put at least six inches of earth on top.
December 2, 2004 - Thursday - This picture shows the dry well with the
perforated pipe installed and the final layer of gravel on top. Now we
can fold over the remaining filter fabric to cover the top of the gravel, and
then put at least six inches of earth on top.
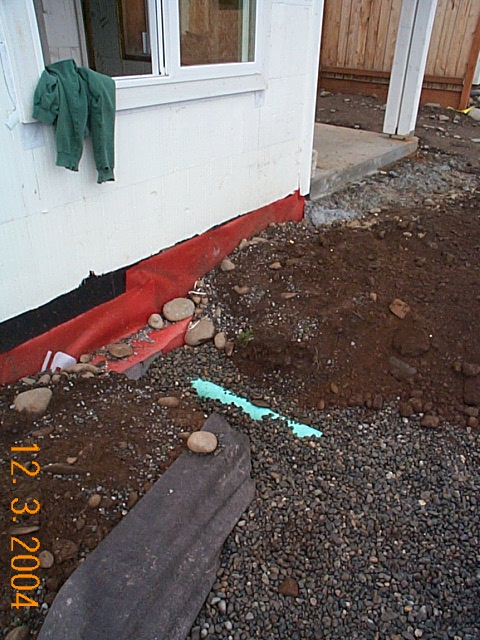
 December 2, 2004 - Thursday - When placing the
Form-A-Drain for the footings, we
already had a plan of where the dry well would be located. In addition to
the down spout drains discharging into the dry well, this picture shows the
footing outlet also flows into the dry well just as it should.
December 2, 2004 - Thursday - When placing the
Form-A-Drain for the footings, we
already had a plan of where the dry well would be located. In addition to
the down spout drains discharging into the dry well, this picture shows the
footing outlet also flows into the dry well just as it should.
 December 2, 2004 - Thursday - Here is the final shot of our dry well after we
passed inspection and completed the back fill. You'll never know its there
once grass or other landscaping covers the area!
December 2, 2004 - Thursday - Here is the final shot of our dry well after we
passed inspection and completed the back fill. You'll never know its there
once grass or other landscaping covers the area!
Back to Summer Breeze Lot 27
Gallery

![[Company Logo Image]](../../images/gmb_hires_10_percent.gif)