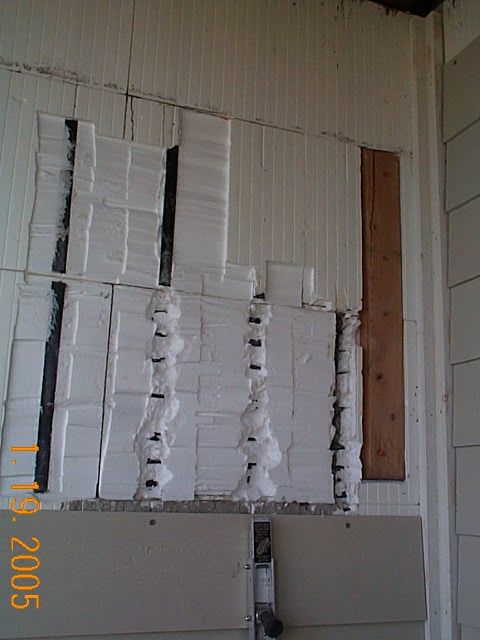
January 19, 2005 - Wednesday - Anyone remember the "blow out" by the front door?
Maybe not. Regardless, one of our two blow outs on the day we poured the
walls occurred just to the left of the front door. Eco-Block regional
manager George Volker and staff member Mark Everson fixed this one just as they
fixed the first one...while Jeffrey continued, nervously, to pour the walls.
Ancient history at this point. This picture shows the area of this blow
out. Remember that fixing a blow out entails waiting for the concrete to pour out of the
wall, cutting a piece of block (ICF block) to fit in the hole, covering the
whole area by screwing a piece of plywood to the wall, and finally re-pouring
the wall with concrete. Sometimes in this process, the new piece of block
used to cover the blow out doesn't fit flush with the rest of the wall...i.e. it
may stick out a bit from the rest of the wall. This was the case with
this blow out "patch". When it comes to putting siding over this area it
is important to "shave" down the patch block so it is flush with the wall.
If we didn't do this, there would be a bulge in the siding. Not good.
One way to shave this patch block flush with the wall is to use a "hot knife".
This is a tool especially made for work with ICFs and is basically a gun style
tool to which you can attached different size and shape wire. When you
pull the trigger the wire gets hot and then you can easily cut out pieces of the
foam by running the hot wire through the foam. We'll get pictures of the
hot knife in action some time in the future as there is much more work for it as
the home proceeds. Interesting to note that some of the hard plastic
"webs" in the wall were damaged during the blow out and also stuck out from the
rest of the wall. These can easily be removed but then there is no place
to screw the siding to the wall. To rectify this situation we attach a
board to the wall flush with the rest of the block. This is done by using
the hot knife to cut out a place for the board, and then we use our "power pin"
gun to shoot nails through the board and into the concrete! Now we have a
place in that area of the wall where we can screw siding to the wall.
Interesting note is that we also use this technique of attaching boards to the
ICF walls in the garage so the hardware for the garage door tracks can be
screwed to the walls.
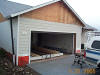
 January 19, 2005 - Wednesday - Yesterday, Ed from Advanced Door came out and
installed our garage door. Jeff and Diane Dawson own Advanced Door.
Not only are they local (in fact just a couple blocks from the site), they are
super nice folks. We had to sheet rock the front, interior wall of the
garage prior to putting on the garage door so we wouldn't have to take all the
tracks down when it comes time to sheet rock. We'll also wait to install a
garage door opener until the ceiling sheet rock in the garage is completed.
Nice work Ed! Thanks!
January 19, 2005 - Wednesday - Yesterday, Ed from Advanced Door came out and
installed our garage door. Jeff and Diane Dawson own Advanced Door.
Not only are they local (in fact just a couple blocks from the site), they are
super nice folks. We had to sheet rock the front, interior wall of the
garage prior to putting on the garage door so we wouldn't have to take all the
tracks down when it comes time to sheet rock. We'll also wait to install a
garage door opener until the ceiling sheet rock in the garage is completed.
Nice work Ed! Thanks!
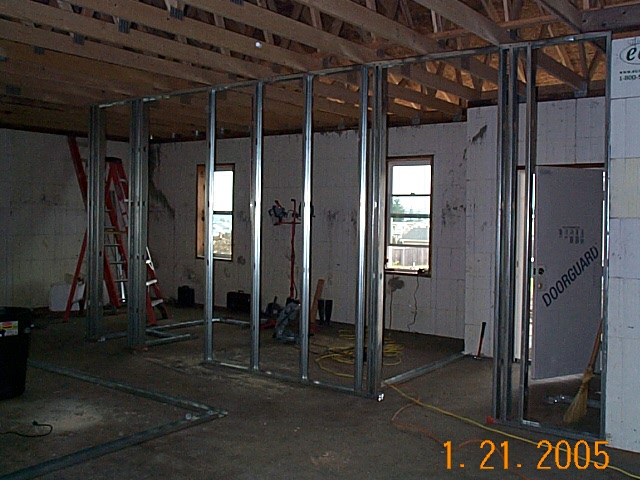
 January 21, 2005 - Friday -Often these days, Jeffrey works outside on siding
during the day light hours and then comes in and works on framing after dark.
Here is some of the framing progress he made last night. This picture is
taken from the great room looking toward the front door and the front bedrooms.
January 21, 2005 - Friday -Often these days, Jeffrey works outside on siding
during the day light hours and then comes in and works on framing after dark.
Here is some of the framing progress he made last night. This picture is
taken from the great room looking toward the front door and the front bedrooms.
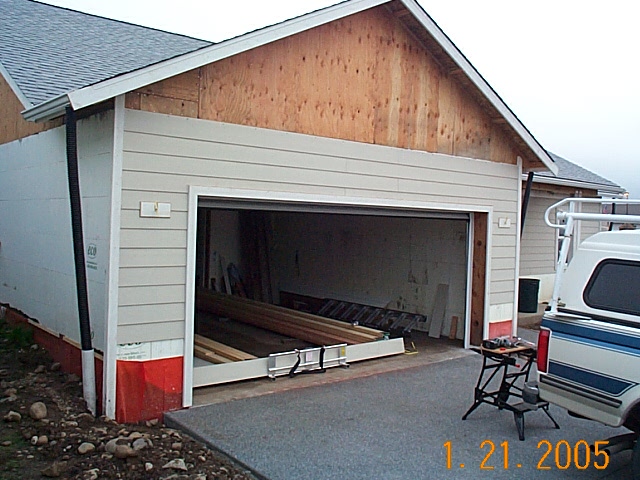
 January 21, 2005 - Friday -Jeffrey continues siding and this time is working on
the front of the garage. Notice there is still space at the bottom of the
walls to install decorative rock of some kind. You can also see the places
on either side of the garage door where lights will be installed.
January 21, 2005 - Friday -Jeffrey continues siding and this time is working on
the front of the garage. Notice there is still space at the bottom of the
walls to install decorative rock of some kind. You can also see the places
on either side of the garage door where lights will be installed.
Back to Summer Breeze Lot 27
Gallery

![[Company Logo Image]](../../images/gmb_hires_10_percent.gif)