January 12, 2005 - Wednesday - The total snow fall during last Friday's "snow
storm" turned out to be 7 inches. A major dump indeed for Sequim which
rarely gets more than an inch or two each winter. Below freezing temps
every night since have kept the snow around, which is just fine since its so
pretty! There is plenty of work both inside and out, so Jeffrey decides to
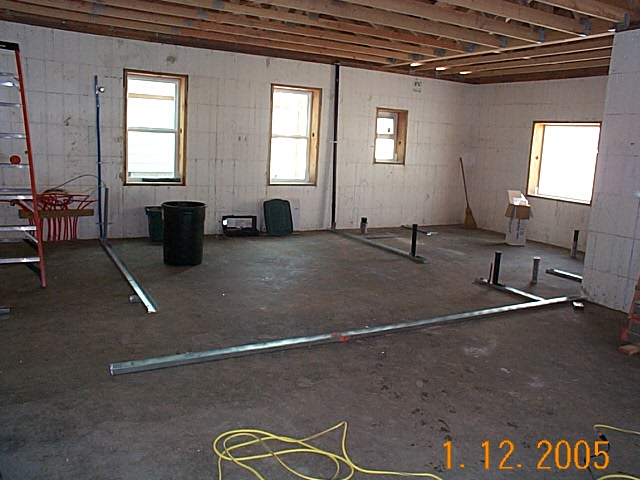
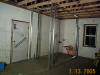
work inside to keep his feet dry! This picture shows the start of
interior framing using the steel studs. The first part of interior framing
is placing steel "track" on the concrete floor in the exact position of every
wall. The track is held down on the concrete with "power pins" which are
special nails that are shot out of a purpose built "gun". Both the nails
and the gun are designed for use with concrete. Not only are there different lengths of these special nails, there are also four different "power
loads" which have varying amounts of gun powder in them. The goal is to
chose the least powerful of the four loads that will set your nail. For
holding down the track we use 1 inch nails and the third most powerful loads.
As a nod to malicious mischief, these power loads are .22 caliber so you could use
them as blanks in your .22 rifle or revolver. We assume this is true since we've
never tried it. The neighbors probably wonder what is going on since the
"gun" sounds just like a gun when firing. Regardless, it is great fun to see
the floor plan emerge as we proceed with installing the bottom track!
Notice our calculations regarding the placement of the drains, etc. that need to
come up inside of walls. If you look carefully in this picture you can see
a number of places where pipes come up inside walls (i.e. inside the bottom
track) just like they should.
January 12, 2005 - Wednesday - The total snow fall during last Friday's "snow
storm" turned out to be 7 inches. A major dump indeed for Sequim which
rarely gets more than an inch or two each winter. Below freezing temps
every night since have kept the snow around, which is just fine since its so
pretty! There is plenty of work both inside and out, so Jeffrey decides to
work inside to keep his feet dry! This picture shows the start of
interior framing using the steel studs. The first part of interior framing
is placing steel "track" on the concrete floor in the exact position of every
wall. The track is held down on the concrete with "power pins" which are
special nails that are shot out of a purpose built "gun". Both the nails
and the gun are designed for use with concrete. Not only are there different lengths of these special nails, there are also four different "power
loads" which have varying amounts of gun powder in them. The goal is to
chose the least powerful of the four loads that will set your nail. For
holding down the track we use 1 inch nails and the third most powerful loads.
As a nod to malicious mischief, these power loads are .22 caliber so you could use
them as blanks in your .22 rifle or revolver. We assume this is true since we've
never tried it. The neighbors probably wonder what is going on since the
"gun" sounds just like a gun when firing. Regardless, it is great fun to see
the floor plan emerge as we proceed with installing the bottom track!
Notice our calculations regarding the placement of the drains, etc. that need to
come up inside of walls. If you look carefully in this picture you can see
a number of places where pipes come up inside walls (i.e. inside the bottom
track) just like they should.
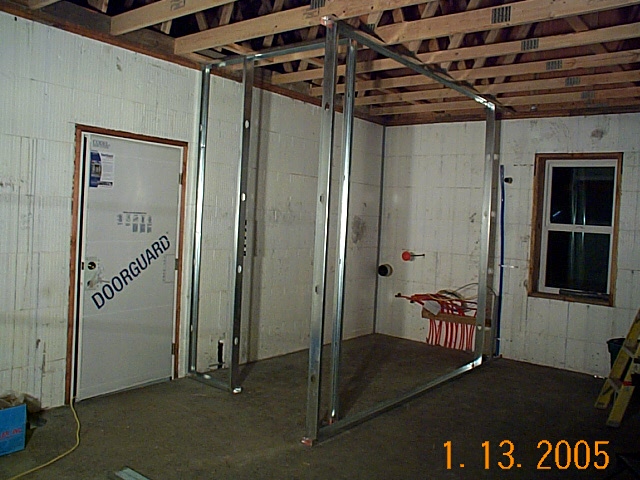
 January 13, 2005 - Thursday - This shot shows the laundry room starting to be
framed out. Just as there are steel "tracks" on the floor, there are also
steel tracks attached to the trusses, mirroring all the of those on the floor.
Once the bottom and top tracks are in place we can begin to install studs and
framed out walls begin to emerge. To position the top tracks correctly we
are using the "plumb" method. This means we use clamps to hold a new top
track roughly in place. Next, we put a stud in the top and bottom track
just as it would be installed. Then we put magnetic levels on the stud.
When these levels show the stud is plumb side to side, we know we have the top
track in the correct position. Now that the top track is in the proper
position, we secure it to the trusses with screws. With the first studs
going up, it really becomes apparent how high our ceiling will be...roughly 9
feet 5 inches! A high ceiling is a great way to make a space feel larger
than it really is.
January 13, 2005 - Thursday - This shot shows the laundry room starting to be
framed out. Just as there are steel "tracks" on the floor, there are also
steel tracks attached to the trusses, mirroring all the of those on the floor.
Once the bottom and top tracks are in place we can begin to install studs and
framed out walls begin to emerge. To position the top tracks correctly we
are using the "plumb" method. This means we use clamps to hold a new top
track roughly in place. Next, we put a stud in the top and bottom track
just as it would be installed. Then we put magnetic levels on the stud.
When these levels show the stud is plumb side to side, we know we have the top
track in the correct position. Now that the top track is in the proper
position, we secure it to the trusses with screws. With the first studs
going up, it really becomes apparent how high our ceiling will be...roughly 9
feet 5 inches! A high ceiling is a great way to make a space feel larger
than it really is.
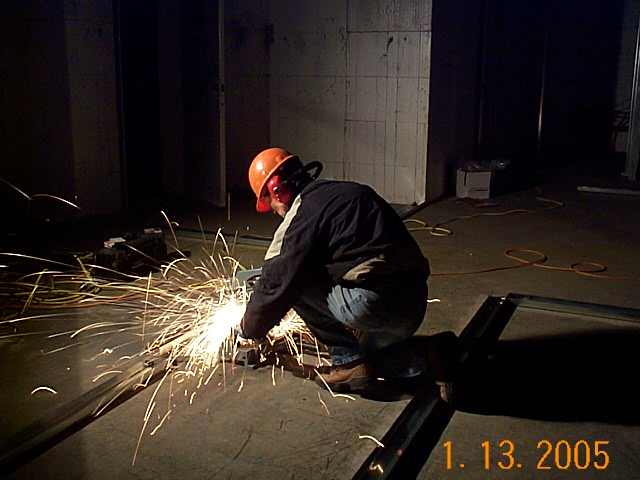
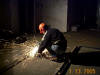 January 13, 2005 - Thursday -Working at night is real easy with the bright
halogen work lights available these days. Here is a great shot of Jeffrey
using the "chop saw" with a metal cutting blade to cut a piece of track.
The sparks really fly and even with his gloves on, he can feel the hot pieces of
metal landing on his hands! Ouch! This isn't one of Jeffrey's famous
"arm shots", but it is a timer shot with the camera sitting on the small ladder.
Maybe this light show is one of the reasons Jeffrey likes working at night!
January 13, 2005 - Thursday -Working at night is real easy with the bright
halogen work lights available these days. Here is a great shot of Jeffrey
using the "chop saw" with a metal cutting blade to cut a piece of track.
The sparks really fly and even with his gloves on, he can feel the hot pieces of
metal landing on his hands! Ouch! This isn't one of Jeffrey's famous
"arm shots", but it is a timer shot with the camera sitting on the small ladder.
Maybe this light show is one of the reasons Jeffrey likes working at night!
Back to Summer Breeze Lot 27
Gallery

![[Company Logo Image]](../../images/gmb_hires_10_percent.gif)