 March 16, 2006 - Thursday - Today our good friend Dale Erickson came by to work
with Jeffrey on the floor tile. For this project we are using glazed
ceramic tile made by
American Marazzi.
We chose their "Cortina" design which is made in the USA! The floor is bright red
in this picture because it has been
covered with a roll on elastic coating of "RedGard"
made by Custom
Building Products. This coating is
required by Custom Building Materials if the customer wants their limited
lifetime "no crack" guarantee.
This coating helps prevent any cracks that may develop in the concrete slab from
being transferred through to the tile. In this shot Dale is working on
tile layout in the master bathroom. This is probably the most time consuming
part of laying tile. It is probably the most important part also since the
quality of the end product is directly related to the quality of the layout.
Layout is done by setting tiles in place per the design requirements of the
customer and the desire to waste as little tile as possible. Once the
installer is happy with the layout, they will snap chalk lines on the floor, and
where these chalk lines intersect is where the tile installation begins.
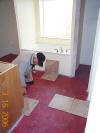
March 16, 2006 - Thursday - Today our good friend Dale Erickson came by to work
with Jeffrey on the floor tile. For this project we are using glazed
ceramic tile made by
American Marazzi.
We chose their "Cortina" design which is made in the USA! The floor is bright red
in this picture because it has been
covered with a roll on elastic coating of "RedGard"
made by Custom
Building Products. This coating is
required by Custom Building Materials if the customer wants their limited
lifetime "no crack" guarantee.
This coating helps prevent any cracks that may develop in the concrete slab from
being transferred through to the tile. In this shot Dale is working on
tile layout in the master bathroom. This is probably the most time consuming
part of laying tile. It is probably the most important part also since the
quality of the end product is directly related to the quality of the layout.
Layout is done by setting tiles in place per the design requirements of the
customer and the desire to waste as little tile as possible. Once the
installer is happy with the layout, they will snap chalk lines on the floor, and
where these chalk lines intersect is where the tile installation begins.
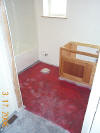 March 16, 2006 - Thursday - Here we see the guest bathroom with its protective
coating of
RedGard already in place, ready for tile installation.
March 16, 2006 - Thursday - Here we see the guest bathroom with its protective
coating of
RedGard already in place, ready for tile installation.
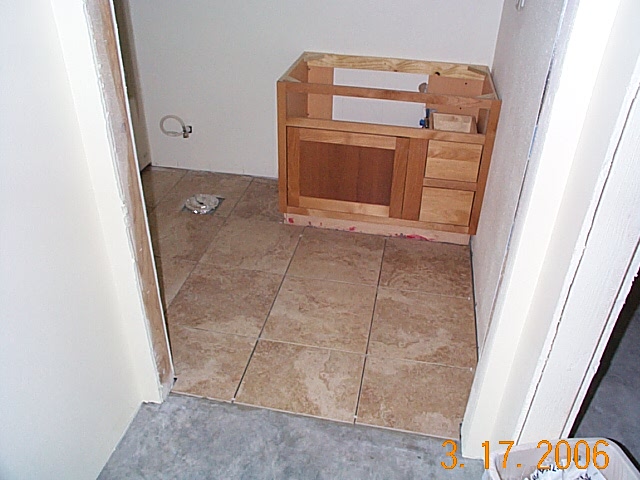
 March 17, 2006 - Friday - The tile installation in the guest bath is
complete...and looks great! For those new to laying tile, we use
"thin-set" to adhere the tile to the floor. Thin-set can be thought of as
concrete with only sand and no rock in it. It is called thin-set because
only a very thin layer (1/8" to 1/4") is all that is needed to keep the tile
securely in place. We use the
FlexBond brand of thin-set. In this picture the tile is down and next will come "grouting".
March 17, 2006 - Friday - The tile installation in the guest bath is
complete...and looks great! For those new to laying tile, we use
"thin-set" to adhere the tile to the floor. Thin-set can be thought of as
concrete with only sand and no rock in it. It is called thin-set because
only a very thin layer (1/8" to 1/4") is all that is needed to keep the tile
securely in place. We use the
FlexBond brand of thin-set. In this picture the tile is down and next will come "grouting".
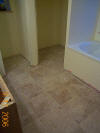 March 17, 2006 - Friday - This photo shows the master bath after the grout work
is complete. The grout is forced between the tiles with a hand float that
looks very much like a small concrete float. We use the
Polyblend brand of sanded grout. We'll let the grout
completely dry and then wipe off the haze left from grouting. Last we'll
apply grout sealer to the grout to give it longer life and reduce the chance of
staining. We use
TileLab grout sealer. Its one thing that we have to pick the color of
tile, but we wish there weren't so many colors of grout to choose from! We
chose "butter cream" (Polyblend
color #17) which goes with our tile color very nicely!
March 17, 2006 - Friday - This photo shows the master bath after the grout work
is complete. The grout is forced between the tiles with a hand float that
looks very much like a small concrete float. We use the
Polyblend brand of sanded grout. We'll let the grout
completely dry and then wipe off the haze left from grouting. Last we'll
apply grout sealer to the grout to give it longer life and reduce the chance of
staining. We use
TileLab grout sealer. Its one thing that we have to pick the color of
tile, but we wish there weren't so many colors of grout to choose from! We
chose "butter cream" (Polyblend
color #17) which goes with our tile color very nicely!
It is well worth mentioning that all of the
Custom Building
Products materials we use for tile installation can be considered "built
green" and can earn LEED (Leadership in Energy and Environmental Design) points
for a building in its quest to becoming LEED certified. The
Custom Building
Products materials qualify for using local materials, and for contributing to
good indoor air quality due to low-emitting sealants. For more info check
out the
LEED Page on the Custom Building Products website.
Back to Summer Breeze Lot 27
Gallery

![[Company Logo Image]](../../images/gmb_hires_10_percent.gif)