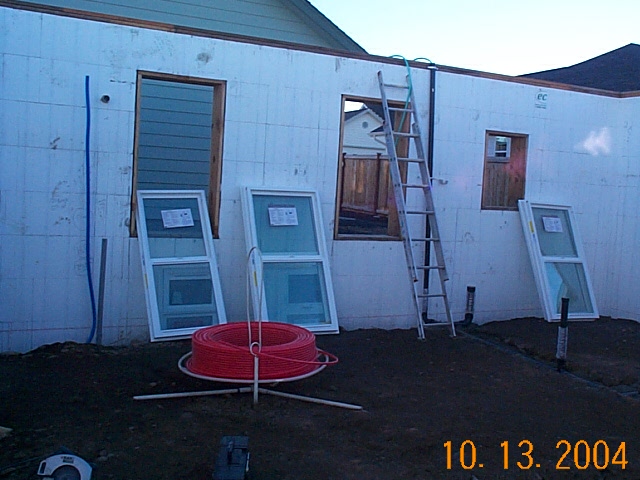
October 13, 2004 - Wednesday - Our plumbing ground work is complete and is
"under test" which means the pipes are pressurized so the inspector can see
there are no leaks. The method used to pressurize the plumbing ground work
is with "head" or "stack" pressure. To generate our stack pressure the
main sewer outlet for the home is plugged up with an inflatable test ball.
After this, one of the system vents (hopefully at the end of a plumbing branch)
is extended up 10 feet in the air. Next, all the drains are sealed with
test caps, and the whole system is filled with water through the extended vent
stack. The extended vent stack can be clearly seen in this shot.
Notice the ladder and hose next to the stack which are used to fill the system
with water. We pass our inspection with flying colors and then its time
for a shower. The "shower" referred to here is the possible soaking the
person who releases the test ball may get as all the water in the system comes
pouring out!
This picture also shows a roll of red PEX tubing on the "unspooler".
The unspooler is basically a turntable on a short stand. Since the roll of
tubing is 1000 feet long, the unspooler allows us to pull out as much as we need
during installation while keeping the roll intact. Thanks very much to
Rick McDougal of H2O Plumbing in Sequim for loaning us the unspooler!!
This particular PEX tubing is for the radiant heat system in the floor. We use PEX made by the good
folks at Vanguard Piping in Kansas. Most of the PEX tubing on
the market is made in foreign courtiers so its really great to find a high
quality product made in the USA! (Vanguard was purchased by Viega in Germany shortly after I wrote this)
PEX tubing is quickly replacing copper
for potable (drinkable) plumbing in residential construction. It has been used
for many years in Europe and is now starting to be used regularly in the USA. PEX
stands for Cross-Linked Polyethylene, which is the type of plastic the tubing is
made from. Check out the link to the Vanguard
website
site above to learn lots more.
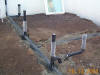 October 13, 2004 - Wednesday - This picture shows most of the "DWV" (drain,
waste, vent or in other words sewer) pipe in the master bathroom. The
bubble wrap around the pipes provides for a bit of seismic isolation as far as
our inspector is concerned. For us however it allows for a bit of
flexibility after the concrete slab is poured. The pipes are in a bed of
sand for protection from large rocks.
October 13, 2004 - Wednesday - This picture shows most of the "DWV" (drain,
waste, vent or in other words sewer) pipe in the master bathroom. The
bubble wrap around the pipes provides for a bit of seismic isolation as far as
our inspector is concerned. For us however it allows for a bit of
flexibility after the concrete slab is poured. The pipes are in a bed of
sand for protection from large rocks.
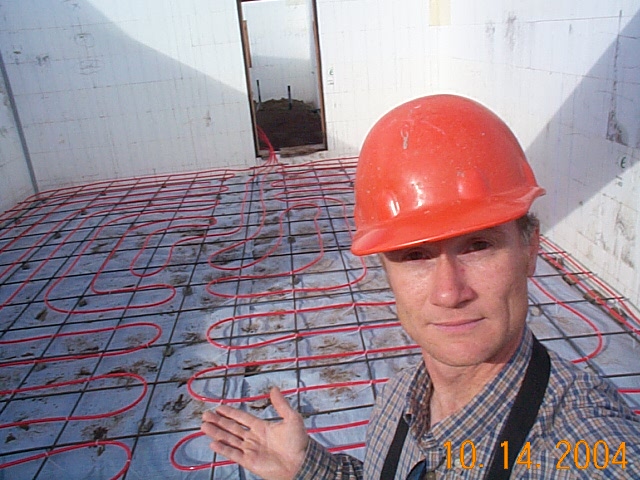
 October 14, 2004 - Thursday - Another of Jeffrey's famous "arm shots" showing
the radiant heating tubes installed in the garage. Slab on Grade
construction usually requires R-10 insulation under the slab, most often
regardless if there is radiant floor heat or not. Also a vapor
barrier is required for slab on grade, which would typically be thick plastic
sheets under the insulation. We use (and sell) the Insul-Tarp product
which is a vapor barrier and insulation all in one. It is the light
colored material below the rebar in this photo. Speaking of rebar, did our
structural engineers go a bit over board requiring #4 (1/2") rebar on 16"
centers, in both directions, for the garage slab? Could be...
October 14, 2004 - Thursday - Another of Jeffrey's famous "arm shots" showing
the radiant heating tubes installed in the garage. Slab on Grade
construction usually requires R-10 insulation under the slab, most often
regardless if there is radiant floor heat or not. Also a vapor
barrier is required for slab on grade, which would typically be thick plastic
sheets under the insulation. We use (and sell) the Insul-Tarp product
which is a vapor barrier and insulation all in one. It is the light
colored material below the rebar in this photo. Speaking of rebar, did our
structural engineers go a bit over board requiring #4 (1/2") rebar on 16"
centers, in both directions, for the garage slab? Could be...
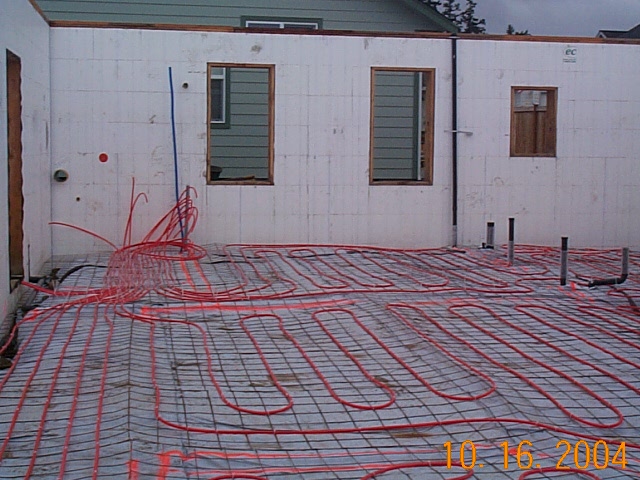
 October 16, 2004 - Saturday - Here is a good shot of the radiant floor
tubes installed in the home. This shot is from the front bedrooms looking
toward the master bedroom. You can see all the tubes start and end on the
far wall of the laundry room. This is where the boiler and "manifold" will
be located. The manifold is a plumbing fixture where all the radiant
heating tubes connect, be they "sends" (hot water going out to the home) or
"returns" (cooler water coming back after a trip through the heating tubes).
October 16, 2004 - Saturday - Here is a good shot of the radiant floor
tubes installed in the home. This shot is from the front bedrooms looking
toward the master bedroom. You can see all the tubes start and end on the
far wall of the laundry room. This is where the boiler and "manifold" will
be located. The manifold is a plumbing fixture where all the radiant
heating tubes connect, be they "sends" (hot water going out to the home) or
"returns" (cooler water coming back after a trip through the heating tubes).
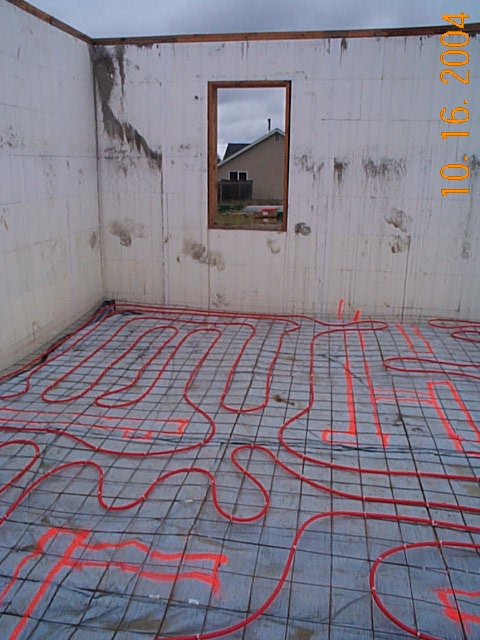
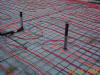
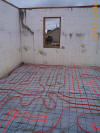 October 16, 2004 - Saturday - Another picture of the radiant heating tubes.
Notice in this shot the outlines of the interior walls painted on the Insul-Tarp
in bright orange paint. We do this so we don't install tubing under where
a wall is going to be placed. This is done so when we anchor the bottom
plates of the walls onto the concrete slab we don't hit any heating tubes.
October 16, 2004 - Saturday - Another picture of the radiant heating tubes.
Notice in this shot the outlines of the interior walls painted on the Insul-Tarp
in bright orange paint. We do this so we don't install tubing under where
a wall is going to be placed. This is done so when we anchor the bottom
plates of the walls onto the concrete slab we don't hit any heating tubes.
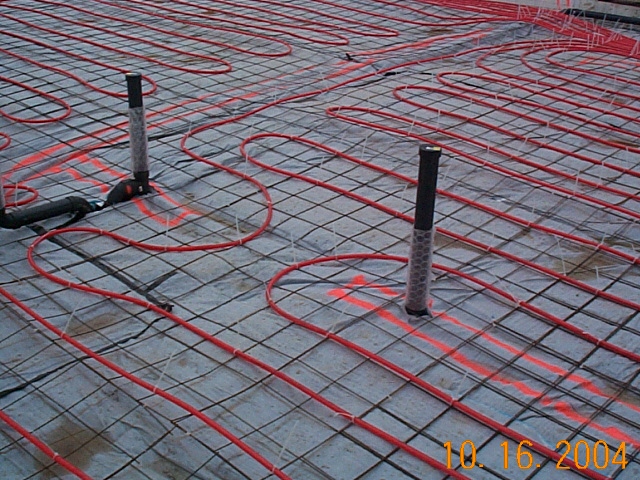
 October 16, 2004 - Saturday - Many times we want DWV pipes to come up inside of
walls (once the walls are built of course). This picture shows a couple of
such pipes in the master bath room. The one to the left is the vent stack
for the shower and the one to the right will be the drain and vent for the his
and hers sinks. Again you can tell they are planned to come up in the
middle of the wall because of the painted outline of a wall on the
Insul-Tarp.
October 16, 2004 - Saturday - Many times we want DWV pipes to come up inside of
walls (once the walls are built of course). This picture shows a couple of
such pipes in the master bath room. The one to the left is the vent stack
for the shower and the one to the right will be the drain and vent for the his
and hers sinks. Again you can tell they are planned to come up in the
middle of the wall because of the painted outline of a wall on the
Insul-Tarp.
Back to Summer Breeze Lot 27
Gallery

![[Company Logo Image]](../../images/gmb_hires_10_percent.gif)